
A vendor is a company you buy products from, such as a manufacturer or supplier. Adding your vendors to XtremeCRM lets you order from them and keep track of that stock from the day you order it to the day it's on your shelf.
You order from a vendor with a purchase order, or PO. A purchase order is the list of products you're buying from one vendor, with the quantity and price of each. It gives you a record of what you ordered, when, and what it cost. It also shows what's still on its way. When the shipment arrives, you receive it on the purchase order, which adds the products to your inventory, along with serial numbers for items like collars and transmitters.
The whole job has four parts:
- Create the purchase order on the vendor's record.
- Add the items you're ordering.
- Post the purchase order and send it to the vendor.
- When the shipment arrives, receive it on a packing slip. Posting the packing slip is what adds the stock to your inventory.
Before you start
| Check | Why it matters |
|---|---|
| The vendor has a Vendor tag. | The Purchase Orders icon only appears on records tagged as a Vendor. If you don't see it, add the Vendor tag to the record first. |
| The vendor is linked to your company. | The purchase order is billed to one of the vendor's companies. If none is linked, XtremeCRM shows No associated company. |
| Your products have a cost. | The price on a purchase order comes from the product's Cost for your company, not its retail price. A product with no cost comes in at $0.00, and you can type the price on the line. |
| A default inventory location is set (recommended). | Under Settings → Orders → Default Inventory Location. New packing slips use it automatically. Without it, you choose the location on every packing slip. |
| You have the Purchase Orders permission. | If the purchase order buttons are grayed out, ask your administrator. |
1. Open the vendor's purchase orders
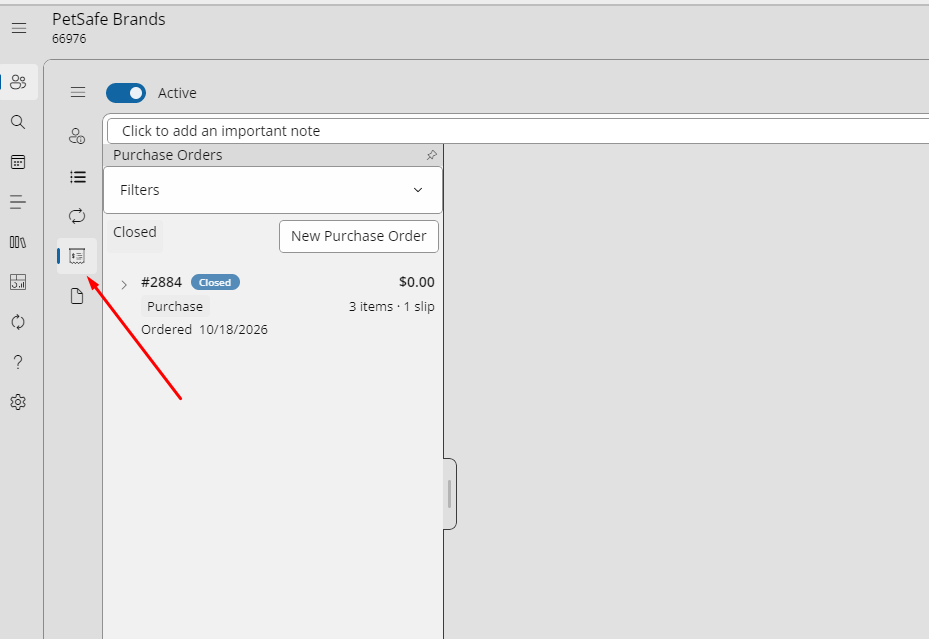
Open the vendor's record and click the Purchase Orders icon. It's in the bar down the left side of the record and looks like a small receipt. The panel that opens is titled Purchase Orders.
2. Create the purchase order
- Click New Purchase Order.
- If the vendor is linked to more than one company, a Choose a company box opens. Pick the company and click OK.
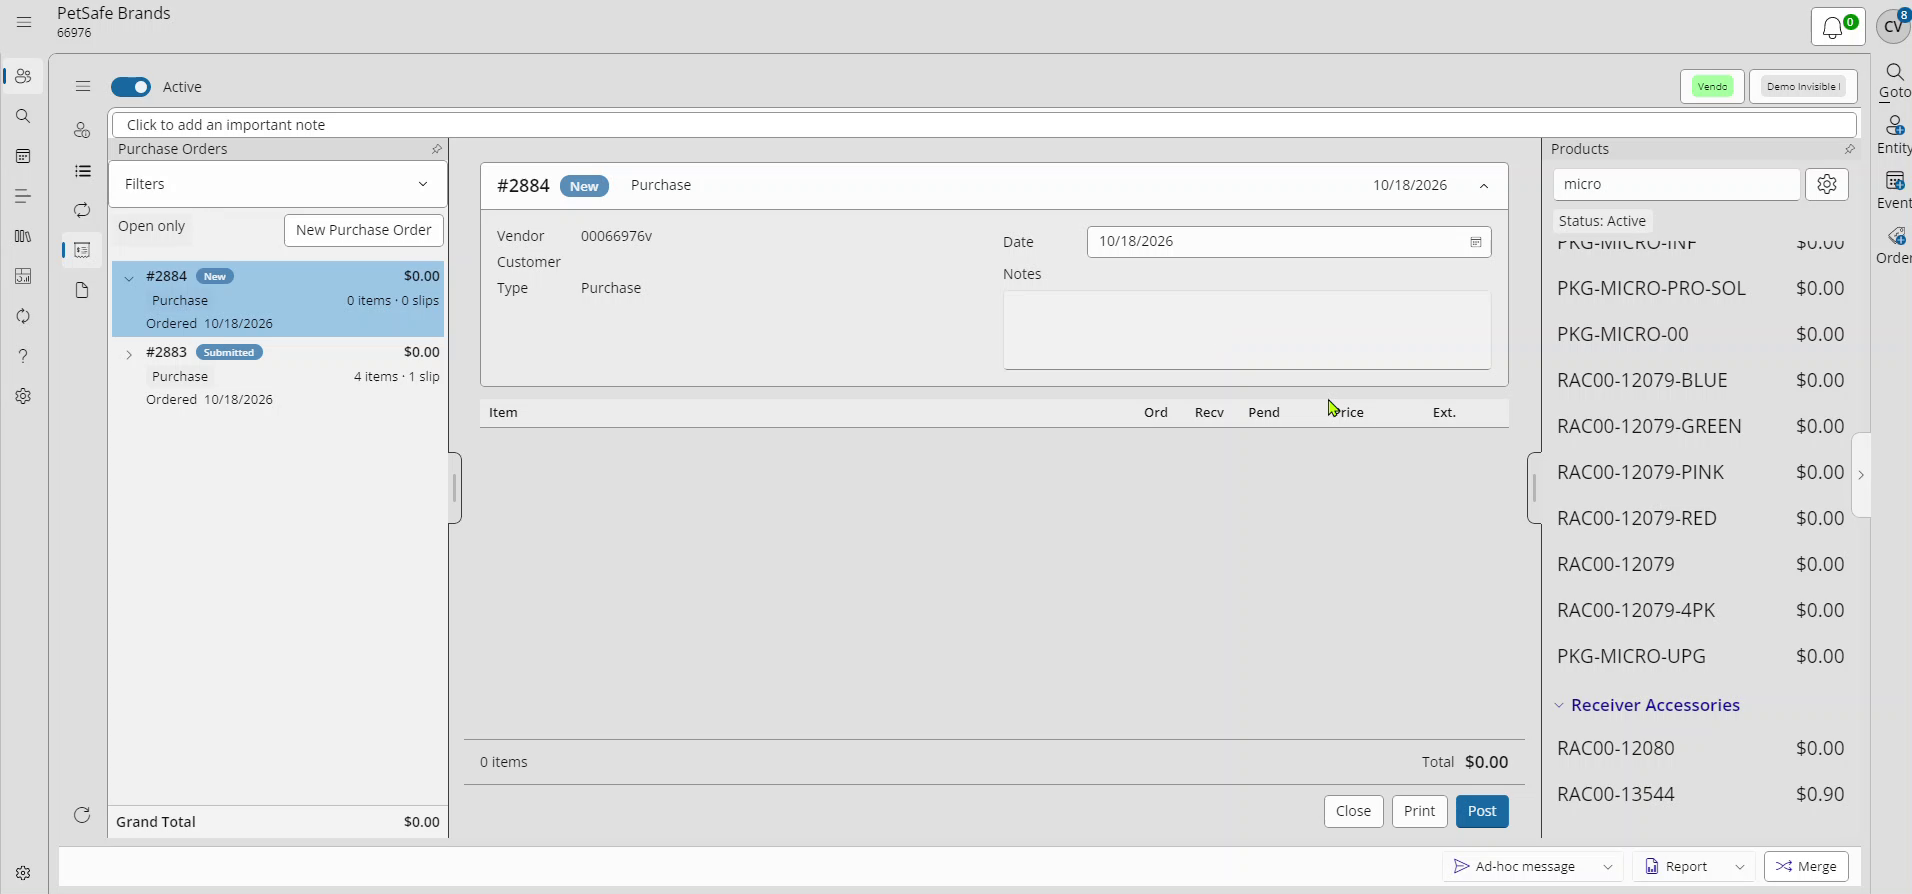
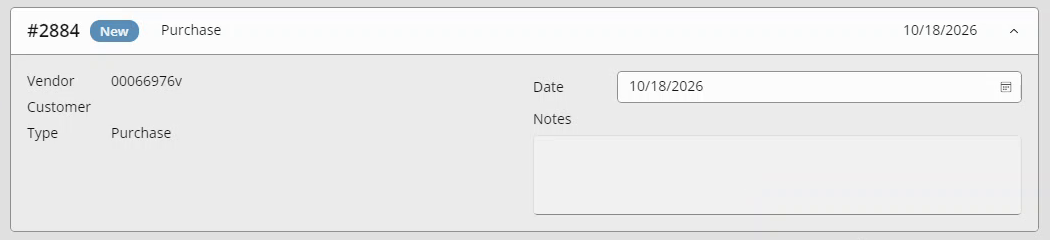
The purchase order is created right away with status New, and its number shows at the top. There's no separate Save button.
Every click on New Purchase Order creates a new purchase order, and a purchase order can't be deleted from XtremeCRM. Click it once. If you create one by mistake, contact support from the Help menu and we'll remove it for you.
- Date defaults to today. Click it to pick a different date.
- Notes (optional): type anything the vendor or your team should know. It saves when you click away.
3. Add the items
- Use the Products pane on the right. Type part of the product name or code in the search box. Results are grouped by category, for example Receivers and Transmitters.
- Double-click the product you want (or select it and press Enter). A message at the bottom confirms it, for example Added MICROLITE COMPUTER COLLAR UNIT, and the product appears as a line.
- Repeat for each product you're ordering.
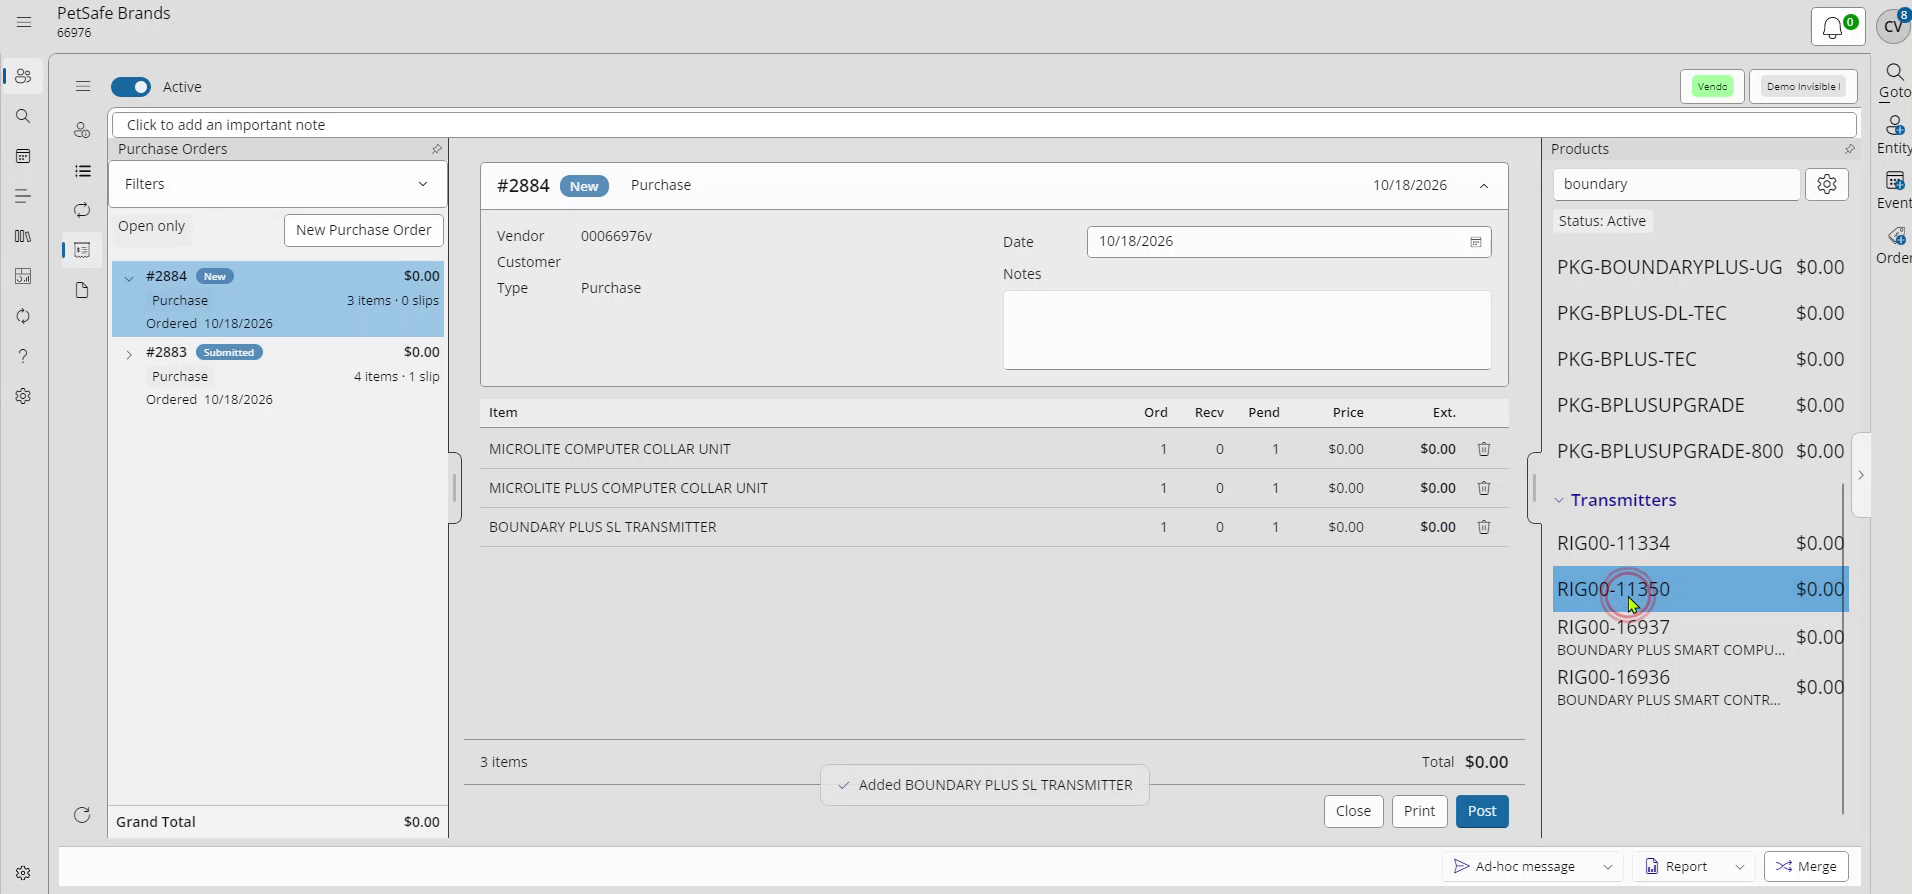
Each new line starts at a quantity of 1 at the product's cost. To change it:
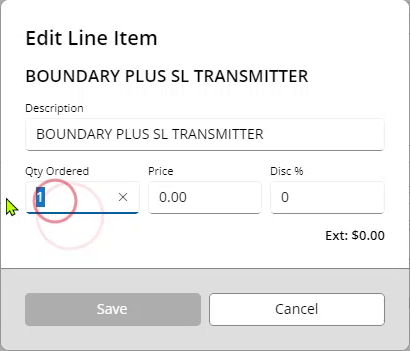
- Click the line, right on the value you want to change (for example the quantity under Ord). The Edit Line Item box opens.
- Change Qty Ordered, Price, Disc % or Description as needed, then click Save.
- To remove a line, click its delete (trash) button and confirm Remove.
- Bundles bring in their components automatically. Change the quantity on the bundle line and the components follow it.
- Check the Total at the bottom before you post.
4. Post and send the purchase order
- Click Post. The status changes to Submitted. The lines are now locked, the Products pane closes, and an Add Packing Slip row appears under the purchase order in the list. The buttons at the bottom change to Close, Add packing slip, Print and Unpost.
- Click Print to open the purchase order report, then print it or save it to send to the vendor.
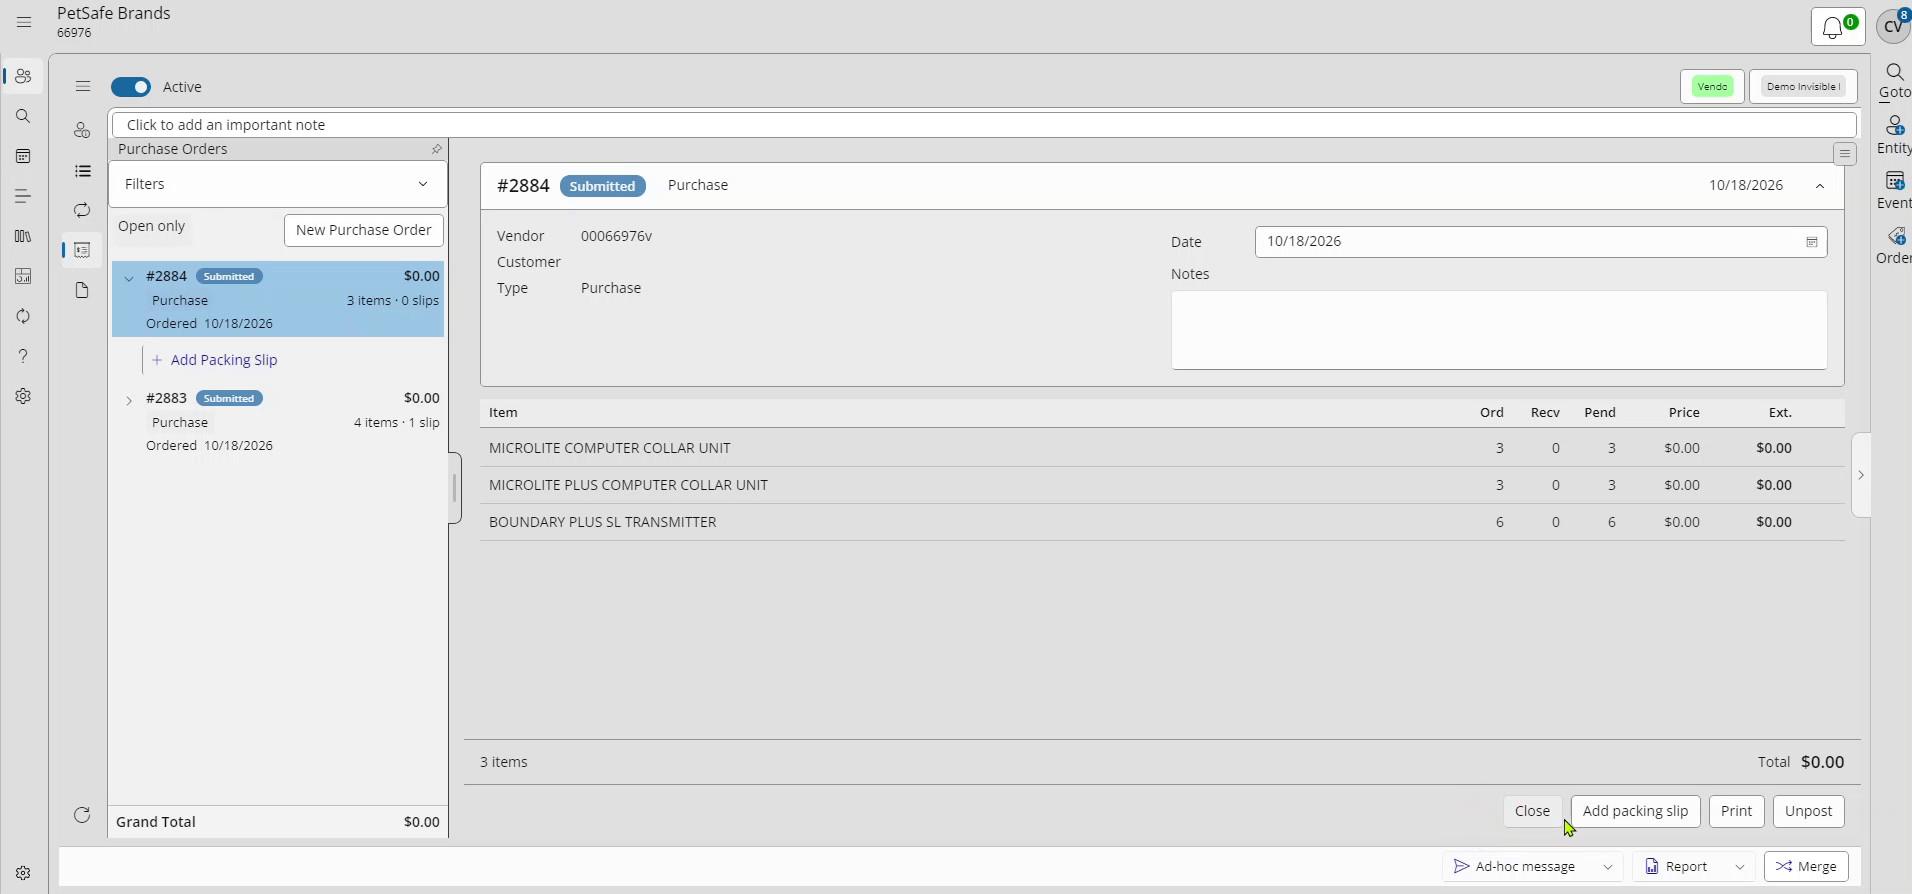
XtremeCRM will post a purchase order even with no lines, so check your items first. If you need to change something after posting, click Unpost. That puts it back to New so you can edit it. Unpost is only possible before any packing slip has been added.
5. Receive the shipment on a packing slip
When the shipment arrives, record it on a packing slip.
- Open the purchase order and click Add packing slip. You can also click the Add Packing Slip row under the purchase order in the list on the left.
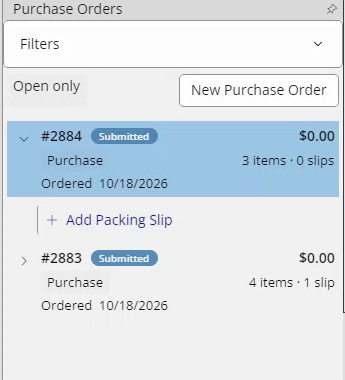
The new slip opens with status Shipped. Every line is already filled in with the quantity still outstanding, so if the whole order arrived you may not need to change anything.
- Check the details at the top of the slip. Click any blue value (for example Select location or Set date) to open the Packing slip box, change it, then click Save.
- Location: the inventory location the stock goes into (Receive into inventory location in the box, for example Main Inventory). This is required. If the slip shows Select location, your company has no default set, so choose one here.
- Shipped: the date the vendor shipped it.
- Received: shows Today, when posted until you post. Leave it unless the stock arrived on an earlier day.
- Courier and Tracking #: optional.

- Fix any quantities that don't match the box. Click the line itself. There's no separate button, but the note at the bottom of the slip reminds you to click a line to set the quantity received. In the Receive box, enter the Quantity received on this slip and click Save. Enter 0 for anything that didn't arrive. It stays outstanding on the purchase order for a later packing slip.
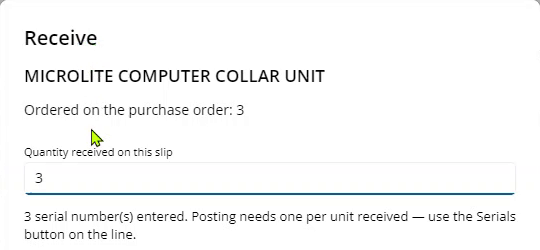
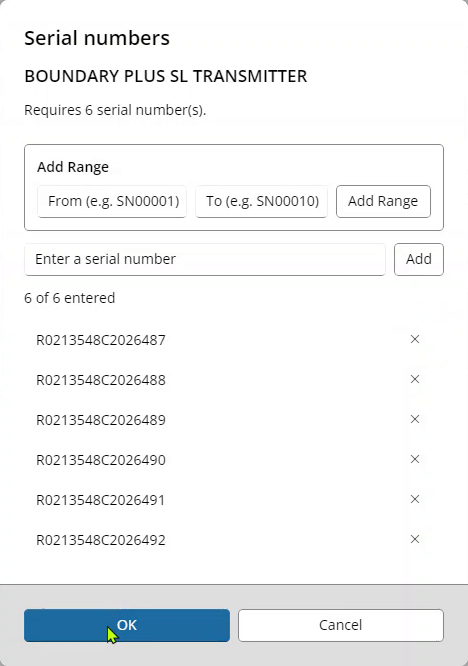
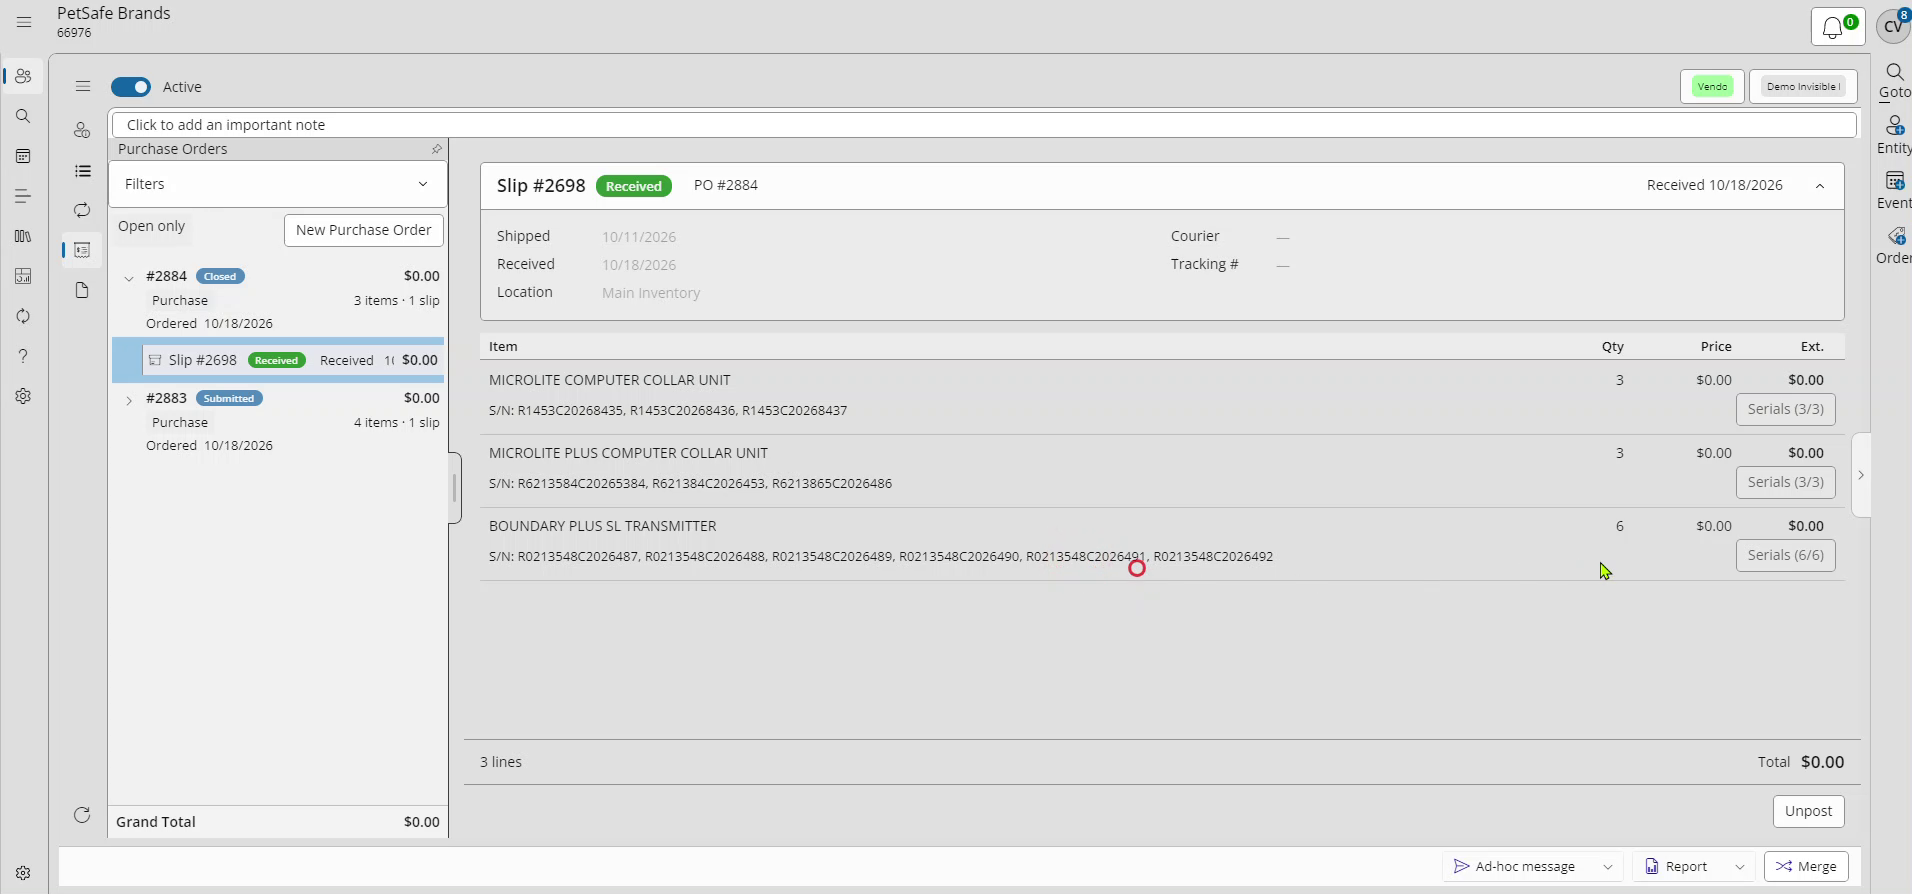
- Enter serial numbers for serialized products. These lines have a Serials button on the right that shows how many are entered, for example Serials (0/3). Click it, then either type each serial number and click Add, or enter a From and To range and click Add Range. The box says how many it needs, for example Requires 3 serial number(s), and a range fills in every number from the From serial to the To serial. The count must match the quantity received, and the serials then show under the line. Click OK.
- Click Post on the packing slip. Its status changes to Received and the stock is added to the inventory location. If that finishes the order, the purchase order shows Closed in the list. The slip now has an Unpost button in case you need to correct it.
Backorders and closing the purchase order
| Situation | What to do |
|---|---|
| Everything arrived | Nothing. When every line has been fully received, the purchase order closes by itself. |
| Part of the order is on backorder | Leave the purchase order open. When the rest arrives, click Add packing slip again. The new slip only fills in what's still outstanding. |
| The vendor won't send the rest | Click Close on the purchase order and confirm. Only do this when you're completely finished with it. A purchase order you close with the Close button can't take any more packing slips, and its packing slips can no longer be unposted. |
| You made a mistake on a received slip | Open the slip and click Unpost. This reverses the stock it added and lets you edit the slip again. Unpost isn't available once the purchase order has been closed with the Close button. |
Finding your purchase orders
The Purchase Orders panel lists the vendor's purchase orders with their status, date and total. Each one shows its item and slip counts, for example 3 items · 1 slip. Click the arrow next to a purchase order to see its packing slips.
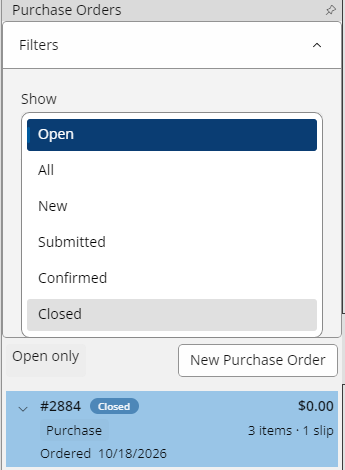
By default the list shows open purchase orders only. To see closed ones, open Filters and change Show to All or Closed. You can also filter by Type and by From and To dates. Clear Filters takes you back to open purchase orders only.
What the statuses mean
| Status | What it means |
|---|---|
| New | Being built. You can add, edit and remove lines. |
| Submitted | Posted and sent to the vendor. Ready to receive packing slips. |
| Confirmed | Same as Submitted. You'll see it if a packing slip was unposted after the purchase order had closed. |
| Closed | Finished. Either everything was received, or someone clicked Close. |
Packing slips are Shipped (not yet received, still editable) or Received (posted into inventory).
If you see a message
| What you see | What to do |
|---|---|
| No Purchase Orders icon on the record | Add the Vendor tag to the record. |
| No associated company | Link the vendor to your company on its record, then try again. |
| This packing slip has no inventory location | Click Location on the slip and choose one, or set a default under Settings → Orders → Default Inventory Location. |
| Nothing is received on this packing slip | Every line is 0. Enter the quantity that arrived on at least one line. |
| List of serial numbers does not match quantity received | Open the serial numbers for that line and add or remove serials until the count matches the quantity. |
| A serial number already exists | That serial is already in your inventory. Check for a typo or a duplicate. |
| Has packing slips and cannot be unposted | A purchase order can't be unposted after receiving starts. Contact support from the Help menu if it needs to change. |
| Was closed, so the packing slip can no longer be unposted | The purchase order was closed with the Close button. Contact support from the Help menu if a correction is needed. |